Spring Security UI Plugin - Reference Documentation
Authors: Burt Beckwith
Version: 1.0-RC3
Table of Contents
1 Introduction to the Spring Security UI Plugin
The Spring Security UI plugin provides CRUD screens and other user management workflows. Non-default functionality is available only if the feature is available; this includes the ACL controllers and views which are enabled if the ACL plugin is installed, Requestmaps support which is available ifgrails.plugin.springsecurity.securityConfigType is set to "Requestmap" or SecurityConfigType.Requestmap in Config.groovy, and persistent cookies support which is enabled if it has been configured with the s2-create-persistent-token script.Release History
- December 21, 2015
- 1.0-RC3 release
- May 20, 2014
- 1.0-RC2 release
- November 11, 2013
- 1.0-RC1 release
- JIRA Issues
- February 12, 2012
- 0.2 release
- JIRA Issues
- September 14, 2010
- 0.1.2 release
- JIRA Issues
- July 27, 2010
- 0.1.1 release
- July 26, 2010
- initial 0.1 release
2 User Management
User search
The default action for the User controller is search. By default only the standard fields (username, enabled, accountExpired, accountLocked, and passwordExpired) are available but this is customizable with the Scripts script - see the section on configuration for details.You can search by any combination of fields, and the username field has an Ajax autocomplete to assist in finding instances. In this screenshot you can see that an email field has been added to the domain class and UI. Leave all fields empty and all checkboxes set at "Either" to return all instances.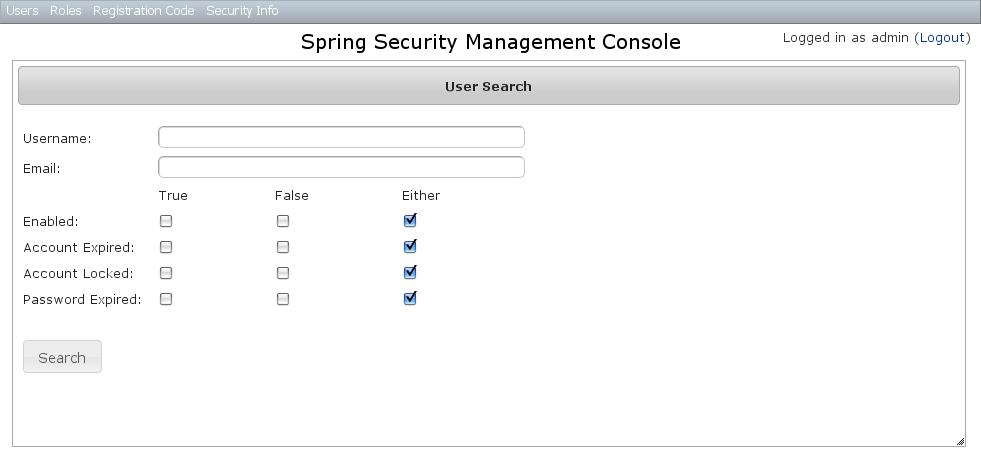 This example shows a search for usernames containing 'adm' (the search is case-insensitive and the search string can appear anywhere in the username). Results are shown paginated in groups of 10. All of the column headers are clickable and will sort the results by that field.
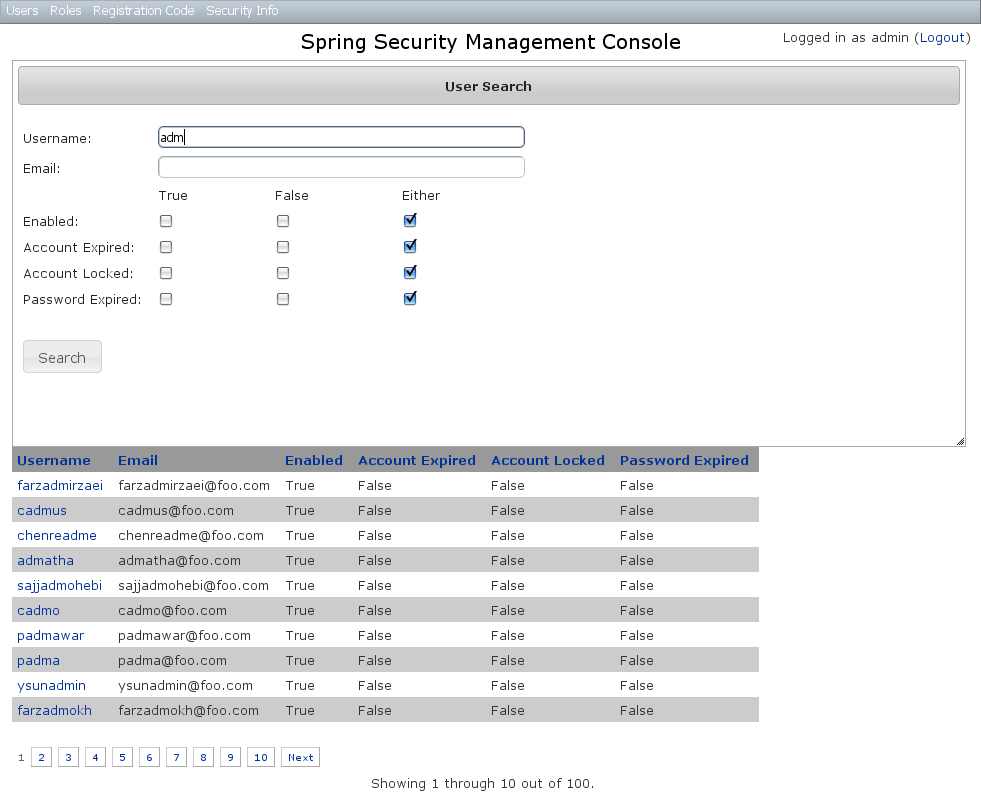
User edit
After clicking through to the 'admin' User you get to the edit page (there are no view pages):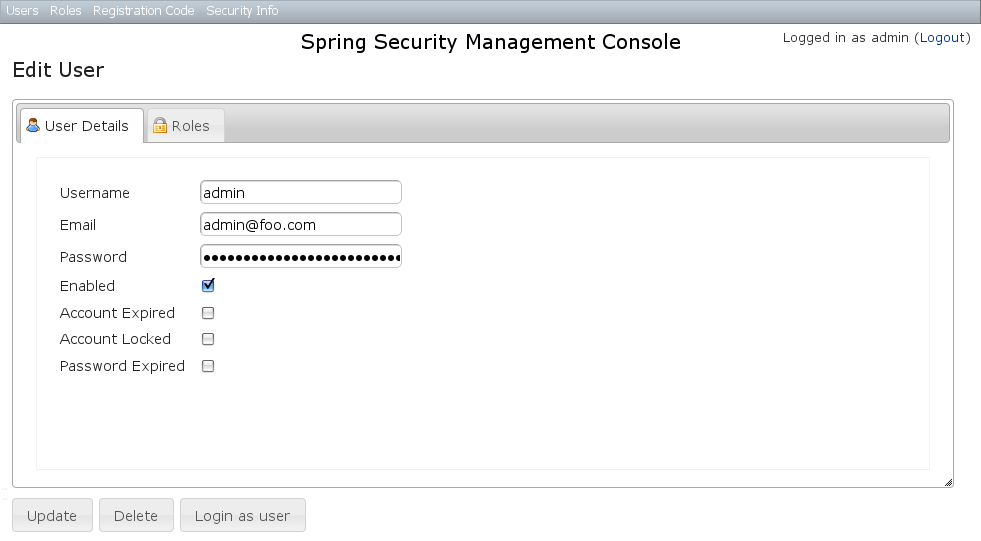 You can update any of the attributes or delete the User. You can see that there's a "Login as user" button here - that is only shown if you're authenticated with a User who is granted
 ROLE_SWITCH_USER (this role name can be configured in Config.groovy):This allows you to temporarily assume the identity of another User (see the Spring Security Core plugin documentation for more information about switch-user). The "Logged in as ..." information in the top right of the screen will change to show that you're running as another User and provide a link to switch back. The role name ROLE_SWITCH_USER is the default but you can change the value with the grails.plugin.springsecurity.ui.switchUserRoleName setting in Config.groovy.If you click the Roles tab you can see the roles granted to this User and can click through to its edit page: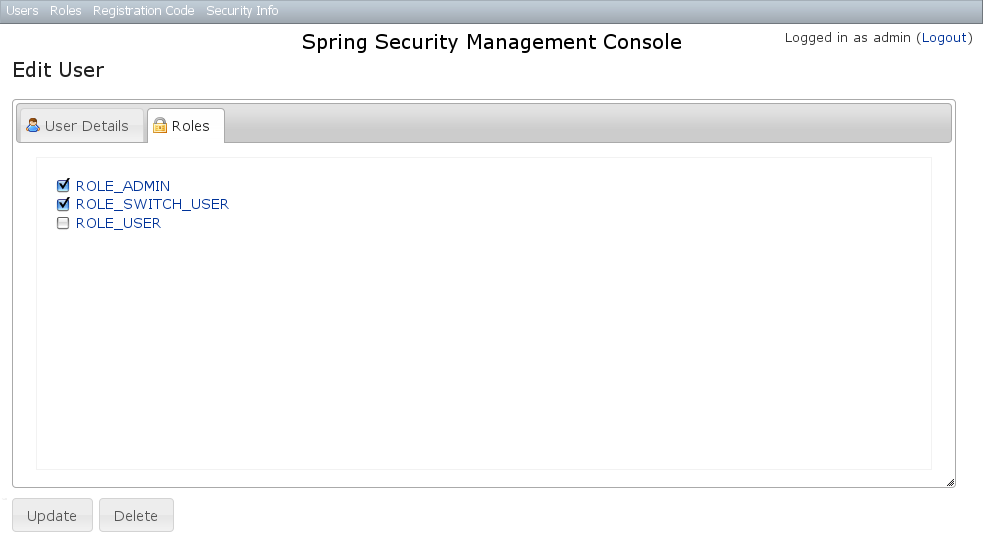
User creation
You can create new Users by going to/user/create or by clicking the Create action in the Users menu.
3 Role Management
Role search
The default action for the Role controller is search. By default only theauthority field is available but this is customizable with the Scripts script - see the section on configuration for details.The authority field has an Ajax autocomplete to assist in finding instances. Leave the field empty to return all instances.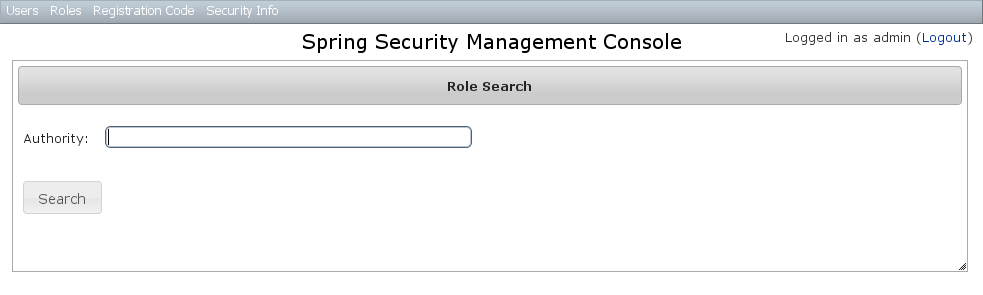 Search is case-insensitive and the search string can appear anywhere in the name (and you can omit the
 ROLE_ prefix). Results are shown paginated in groups of 10 but if there's only one result you'll be forwarded to the edit page for that Role. The authority column header is clickable and will sort the results by that field.Role edit
After clicking through to a Role you get to the edit page (there are no view pages):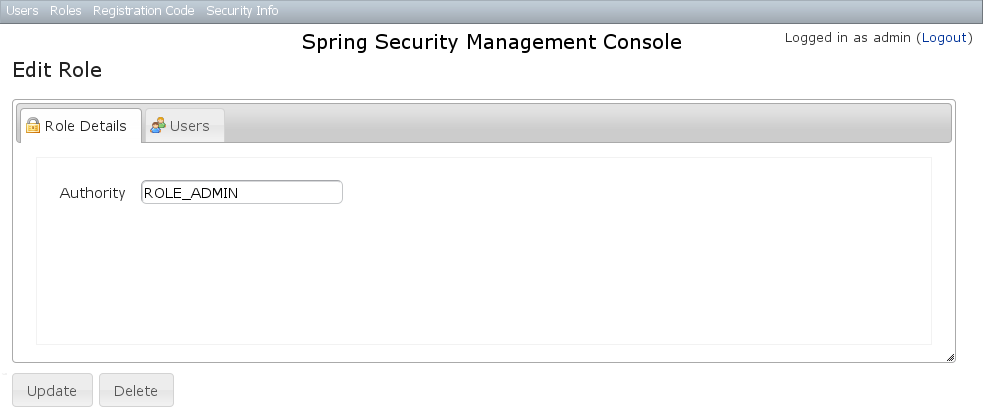 You can update any of the attributes or delete the Role. Any user that had been granted the Role will lose the grant but otherwise be unaffected.If you click the Users tab you can see which users have a grant for this Role and can click through to their edit page:
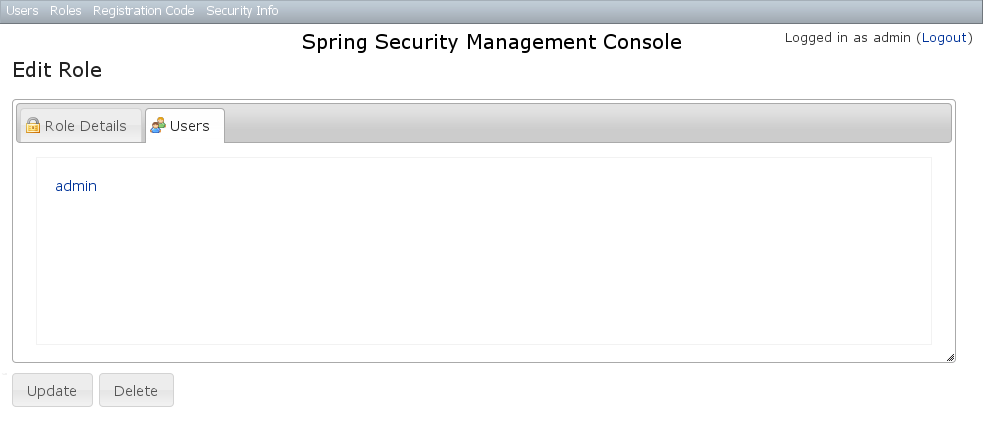
Role creation
You can create new Roles by going to/role/create or by clicking the Create action in the Roles menu.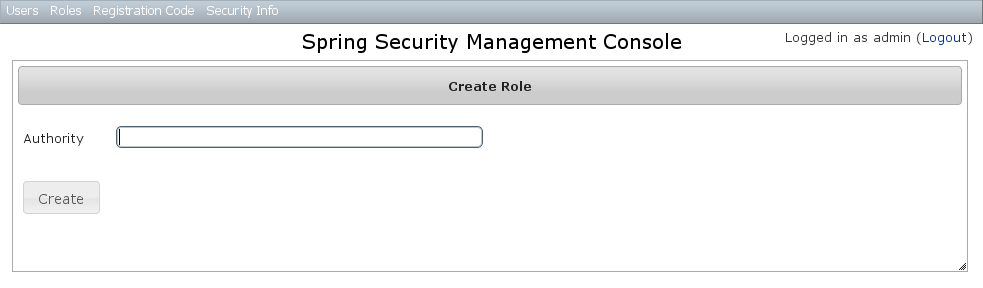
4 Requestmap Management
The default approach to securing URLs is with annotations, so the Requestmaps menu is only shown ifgrails.plugin.springsecurity.securityConfigType has the value "Requestmap" or SecurityConfigType.Requestmap in Config.groovy.Requestmap search
The default action for the Requestmap controller is search. By default only the standard fields (url and configAttribute) are available but this is customizable with the Scripts script - see the section on configuration for details.You can search by any combination of fields, and the url and configAttribute fields have an Ajax autocomplete to assist in finding instances. Leave both fields empty to return all instances.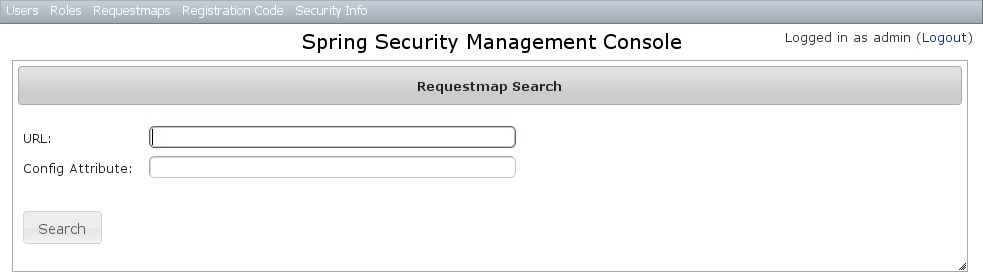 Searching is case-insensitive and the search string can appear anywhere in the field. Results are shown paginated in groups of 10 and you can click on either header to sort by that field:
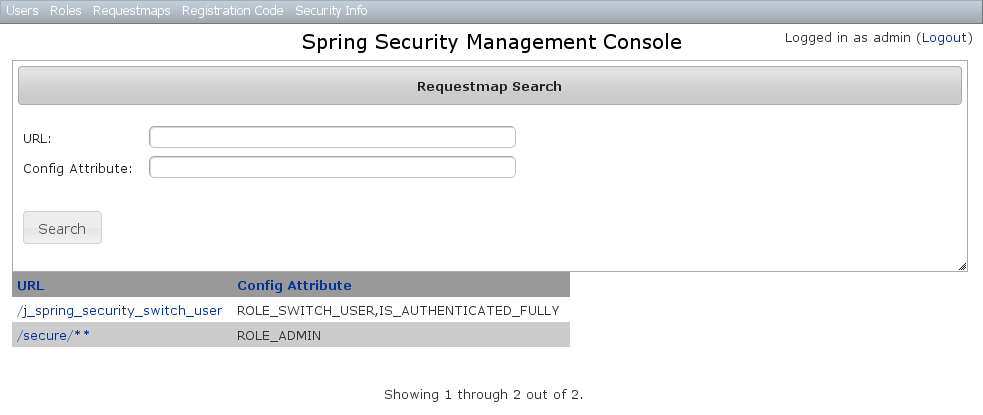
Requestmap edit
After clicking through to a Requestmap you get to the edit page (there are no view pages):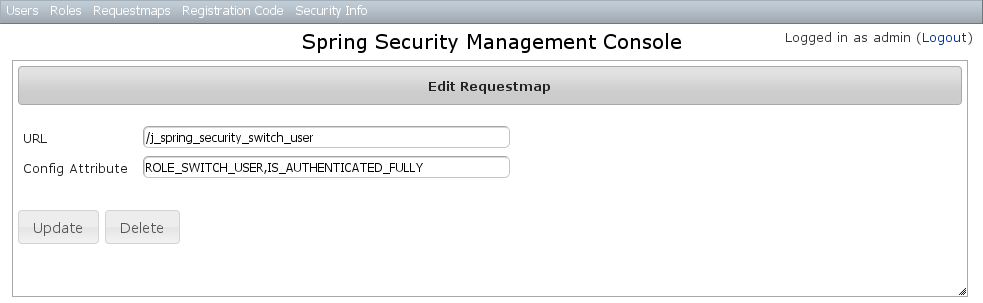 You can update any of the attributes or delete the Requestmap. Editing or deleting a Requestmap resets the cache of loaded instances, so your changes will take effect immediately.
Requestmap creation
You can create new Requestmaps by going to/requestmap/create or by clicking the Create action in the Requestmaps menu.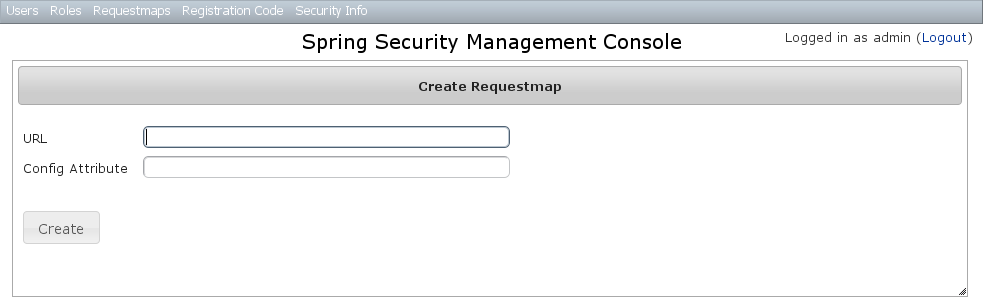 Creating a Requestmap resets the cache of loaded instances, so your changes will take effect immediately.
5 User Registration
Most of the plugin's controllers are intended to be part of a backend admin application, but the Registration and Forgot Password workflows are expected to be user-facing. So they're not available in the admin menu like the User, Role, and other backend functionality - you'll need to expose them to your users.One way to do this is to replace the defaultlogin.gsp that's provided by the Spring Security Core plugin with this plugin's version. You can do this by running grails s2ui-override auth - see the section on configuration for more details. If you do this your users will have links to both workflows from the login screen: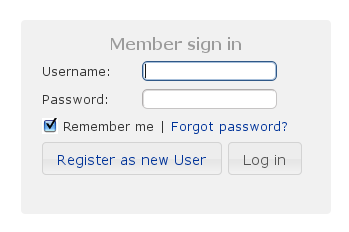
Registration
Navigate to/register/: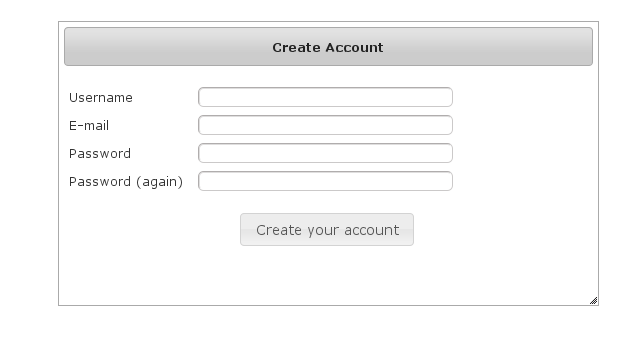 After filling out valid values an email will be sent and you'll see a success screen:
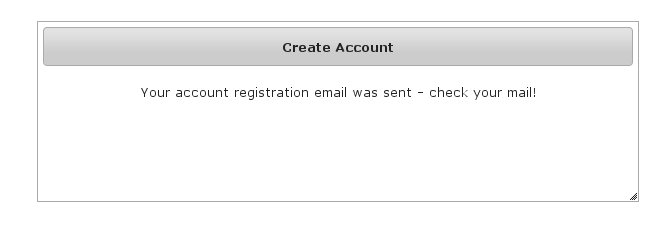 Click on the link in the email:
 and you'll finalize the process, which involves enabling the locked user and pre-authenticating, then redirecting to the configured destination:
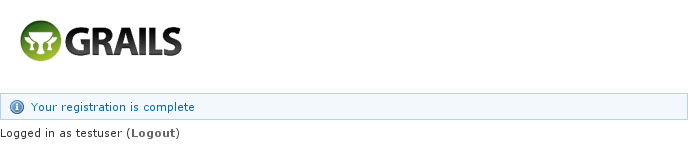
Configuration
The post-registration destination url is configurable ingrails-app/conf/Config.groovy using the postRegisterUrl attribute:grails.plugin.springsecurity.ui.register.postRegisterUrl = '/welcome'
grails.plugin.springsecurity.successHandler.defaultTargetUrl value will be used, which is '/' by default.You can customize the subject, body, and from address of the registration email by overriding the default values in grails-app/conf/Config.groovy, for example:grails.plugin.springsecurity.ui.register.emailBody = '...' grails.plugin.springsecurity.ui.register.emailFrom = '...' grails.plugin.springsecurity.ui.register.emailSubject = '...'
emailBody property should be a GString and will have the User domain class instance in scope in the user variable, and the generated url to click to finalize the signup in the url variable.In addition, each new user will be granted ROLE_USER after finalizing the registration. If you want to change the default role, add more, or grant no roles at all (for example if you want an admin to approve new users and explicitly enable new users) then you can customize that with the defaultRoleNames attribute (which is a List of Strings):grails.plugin.springsecurity.ui.register.defaultRoleNames = [] // no roles
grails.plugin.springsecurity.ui.register.defaultRoleNames = ['ROLE_CUSTOMER']
Mail configuration
By default the plugin uses the Mail plugin to send emails, but only if it installed. This is configurable by registering your ownMailStrategy implementation - see the section on configuration for more information. The plugin assumes that the Mail plugin and an SMTP server are already configured.Notes
You should consider the registration code as starter code - every signup workflow will be different, and this should help you get going but is unlikely to be sufficient. You may wish to collect more information than just username and email - first and last name for example. Rungrails s2ui-override register to copy the registration controller and GSPs into your application to be customized.If there are unexpected validation errors during registration (which can happen when there is a disconnect between the domain classes and the code in RegisterController they will be logged at the warn or error level, so enable logging to ensure that you see the messages, e.g.log4j = {
…
warn 'grails.plugin.springsecurity.ui.SpringSecurityUiService'
…
}RegisterControllerand its GSPs assume that your User domain class has ans2ui-overridescript) if you don't need an email confirmation step or add an email field.
RegistrationCode search
The plugin uses itsgrails.plugin.springsecurity.ui.RegistrationCode domain class to store a token associated with the new users' username for use when finishing the registration process after the user clicks the link in the generated email (and also as part of the forgot-password workflow). The plugin includes a controller and GSPs to manage these instances.The default action for the RegistrationCode controller is search. By default only the standard fields (username and token) are available but this is customizable with the Scripts script - see the section on configuration for details.You can search by any combination of fields, and both fields have an Ajax autocomplete to assist in finding instances. Leave both fields empty to return all instances.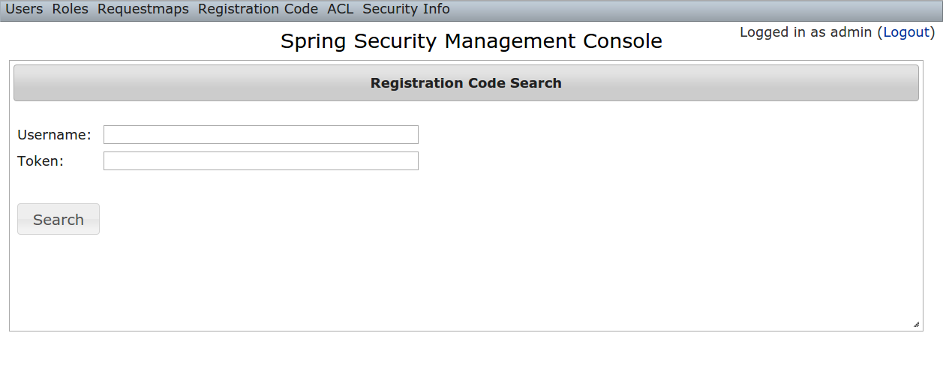 Searching is case-insensitive and the search string can appear anywhere in the field. Results are shown paginated in groups of 10 and you can click on any header to sort by that field:
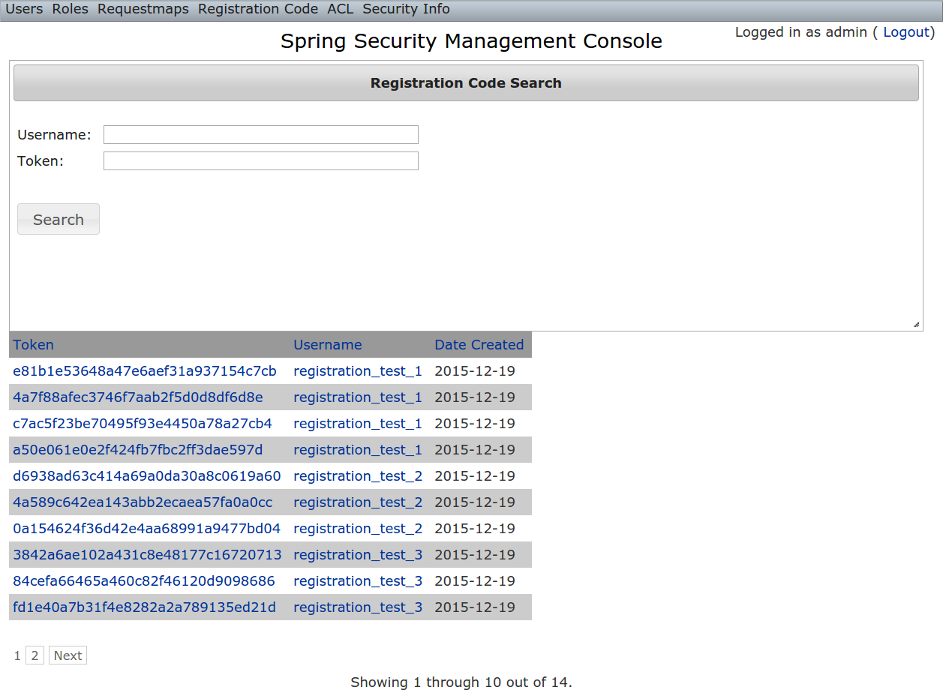
RegistrationCode edit
After clicking through to a RegistrationCode you get to the edit page (there are no view pages):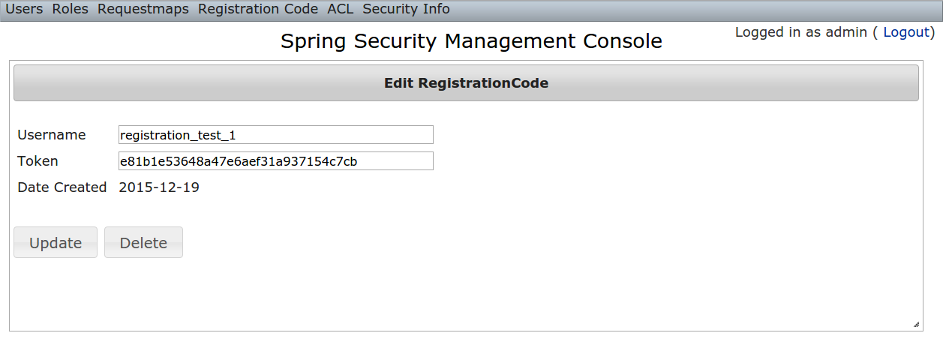 You can update the
 username or token attribute or delete the RegistrationCode.Since instances are created during the "User Registration" and "Forgot Password" workflows, there is no functionality in this plugin to create new instances.
6 Forgot Password
Like the Registration workflow, the Forgot Password workflow is expected to be user-facing. So it's not available in the admin menu like the User, Role, and other backend functionality - you'll need to expose them to your users.One way to do this is to replace the defaultlogin.gsp that's provided by the Spring Security Core plugin with this plugin's version. You can do this by running grails s2ui-override auth - see the section on configuration for more details. If you do this your users will have links to both workflows from the login screen:Forgot Password
Navigate to/register/forgotPassword: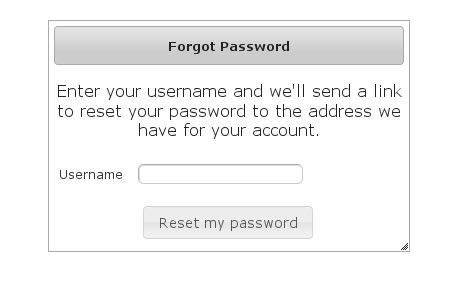 After entering a valid username an email will be sent and you'll see a success screen:
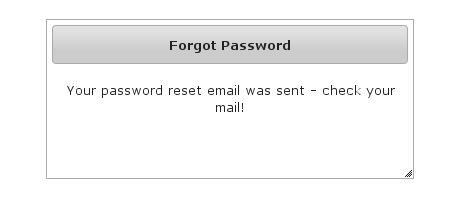 Click on the link in the email:
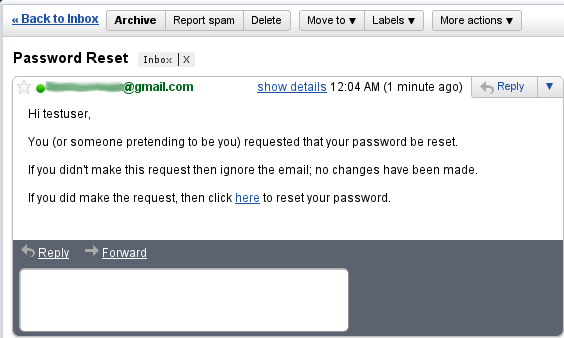 and you'll open the reset password form:
 After entering a valid password you'll finalize the process, which involves storing the new password hashed in the user table and pre-authenticating, then redirecting to the configured destination:
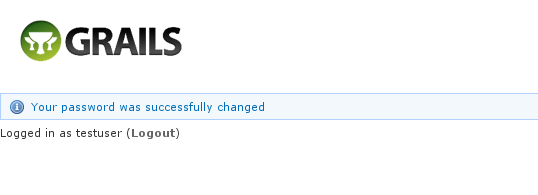
Configuration
The post-reset destination url is configurable ingrails-app/conf/Config.groovy using the postResetUrl attribute:grails.plugin.springsecurity.ui.forgotPassword.postResetUrl = '/reset'
defaultTargetUrl value will be used, which is '/' by default.You can customize the subject, body, and from address of the reset email by overriding the default values in grails-app/conf/Config.groovy, for example:grails.plugin.springsecurity.ui.forgotPassword.emailBody = '...' grails.plugin.springsecurity.ui.forgotPassword.emailFrom = '...' grails.plugin.springsecurity.ui.forgotPassword.emailSubject = '...'
emailBody property should be a GString and will have the User domain class instance in scope in the user variable, and the generated url to click to reset the password in the url variable.Mail configuration
By default the plugin uses the Mail plugin to send emails, but only if it installed. This is configurable by registering your ownMailStrategy implementation - see the section on configuration for more information. The plugin assumes that the Mail plugin and an SMTP server are already configured.Notes
Like the registration code, consider this workflow as starter code. Rungrails s2ui-override register to copy the registration controller and GSPs into your application to be customized.RegisterControllerand its GSPs assume that your User domain class has an
7 ACL Management
ACL management should be done using the API exposed byAclService and AclUtilService. Both services have a much more intuitive and convenient high-level approach to managing ACLs, ACEs, etc. The functionality in this plugin is to provide a CRUD interface for fine-grained ACL management.The ACL menu is only available if the ACL plugin is installed.
7.1 AclClass Management
The default action for the AclClass controller is search. By default only the standard fields are available but this is customizable with the Scripts script - see the section on configuration for details.TheclassName field has an Ajax autocomplete to assist in finding instances. Leave the field empty to return all instances.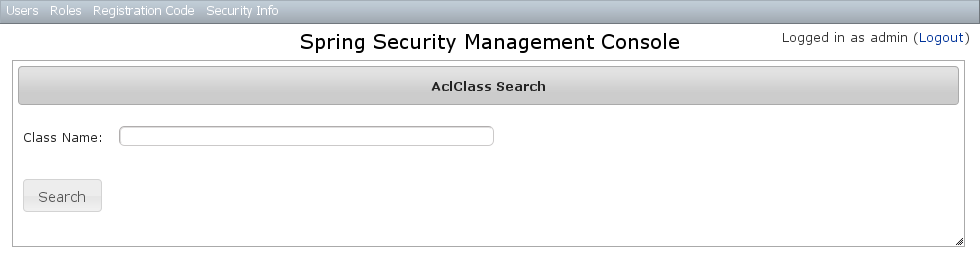 Searching is case-insensitive and the search string can appear anywhere in the field. Results are shown paginated in groups of 10 and you can click on the
 className column header to sort the results by that field: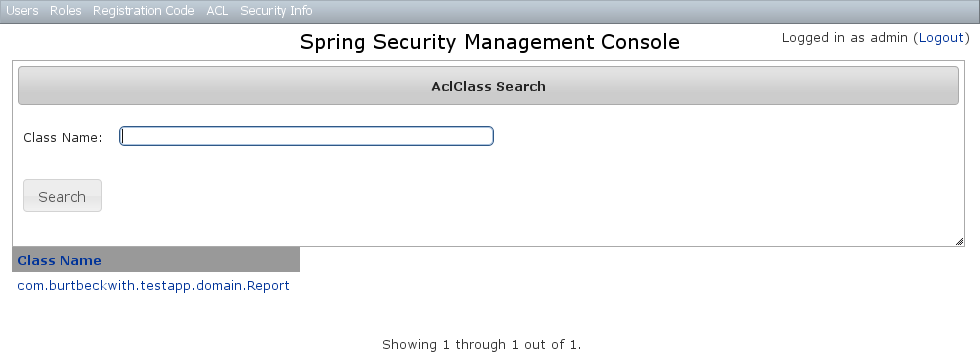
AclClass Edit
After clicking through an AclClass you get to the edit page (there are no view pages):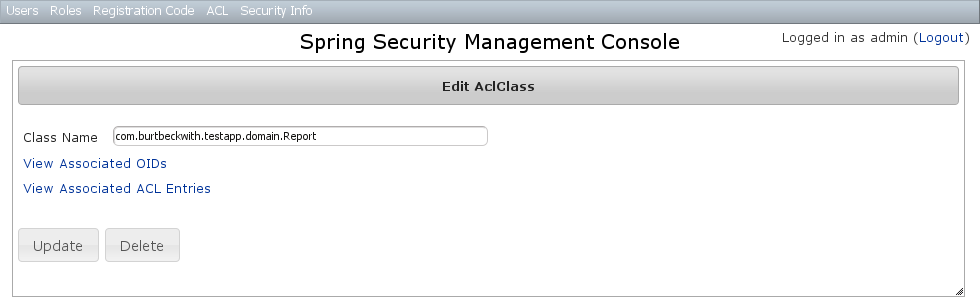 You can update the name, and delete the instance if there aren't any associated
 AclObjectIdentity or AclEntry instances - by default there is no support for cascading.You can also see the associated AclObjectIdentity instances (OIDs) or AclEntry instances.AclClass Create
You can create new instances by going to/aclClass/create or by clicking the Create action in the Class menu under ACL.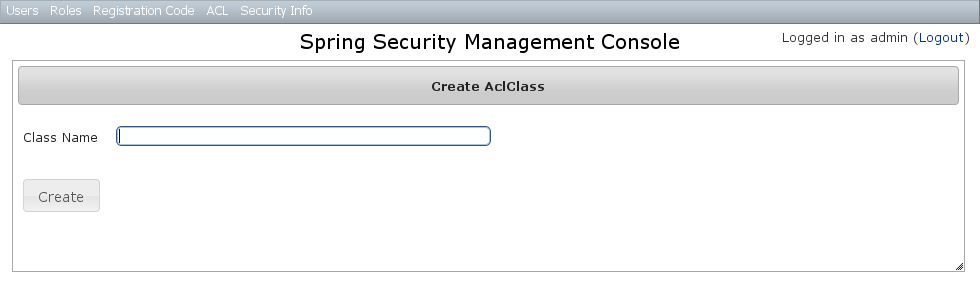
7.2 AclSid Management
The default action for the AclSid controller is search. By default only the standard fields are available but this is customizable with the Scripts script - see the section on configuration for details.Thesid field has an Ajax autocomplete to assist in finding instances. Leave the field empty and principal set to Either to return all instances.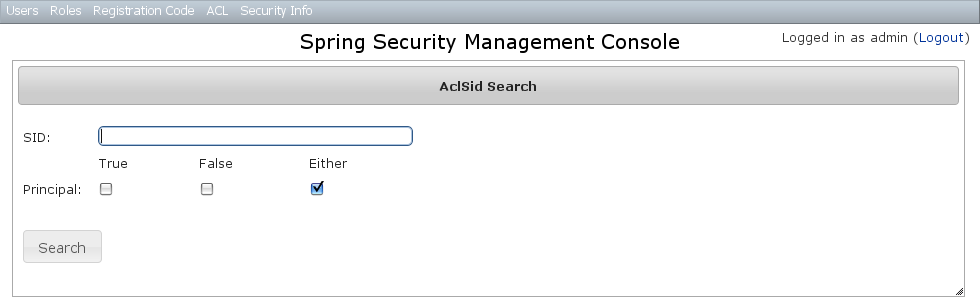 Results are shown paginated in groups of 10. The column headers are clickable and will sort the results by that field:
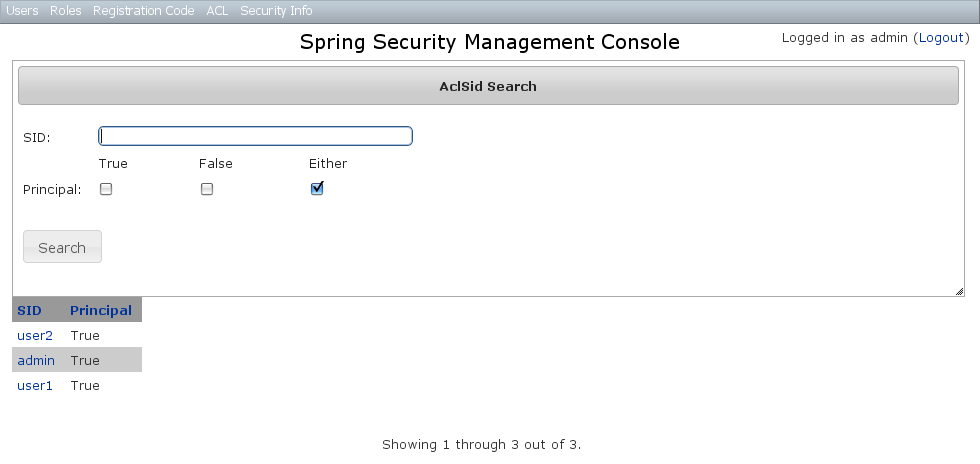
AclSid Edit
After clicking through to a sid you get to the edit page (there are no view pages):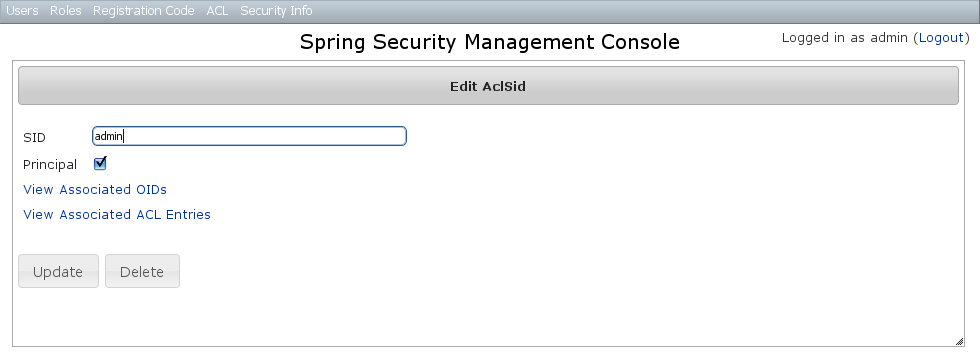 You can update the name and whether it's a Principal sid or a Role sid, and delete the instance if there aren't any associated
 AclObjectIdentity or AclEntry instances - by default there is no support for cascading.You can also see the associated AclObjectIdentity instances (OIDs) or AclEntry instances.AclSid Create
You can create new instances by going to/aclSid/create or by clicking the Create action in the SID menu under ACL.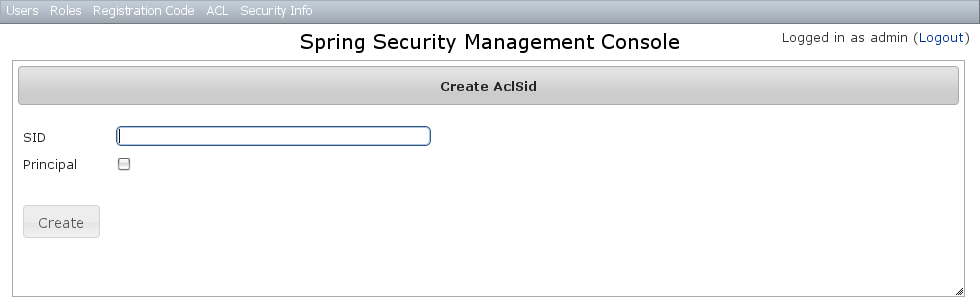
7.3 AclObjectIdentity Management
The default action for the AclObjectIdentity controller is search. By default only the standard fields are available but this is customizable with the Scripts script - see the section on configuration for details.Leave all fields at their default values to return all instances.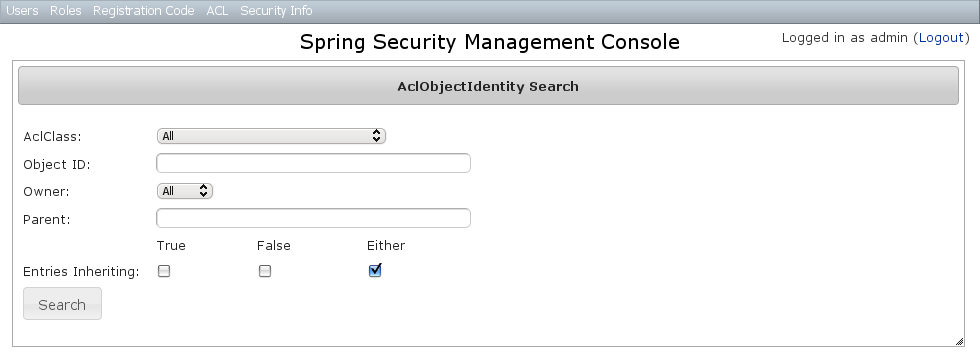 Results are shown paginated in groups of 10 and you can click on any header to sort by that field:
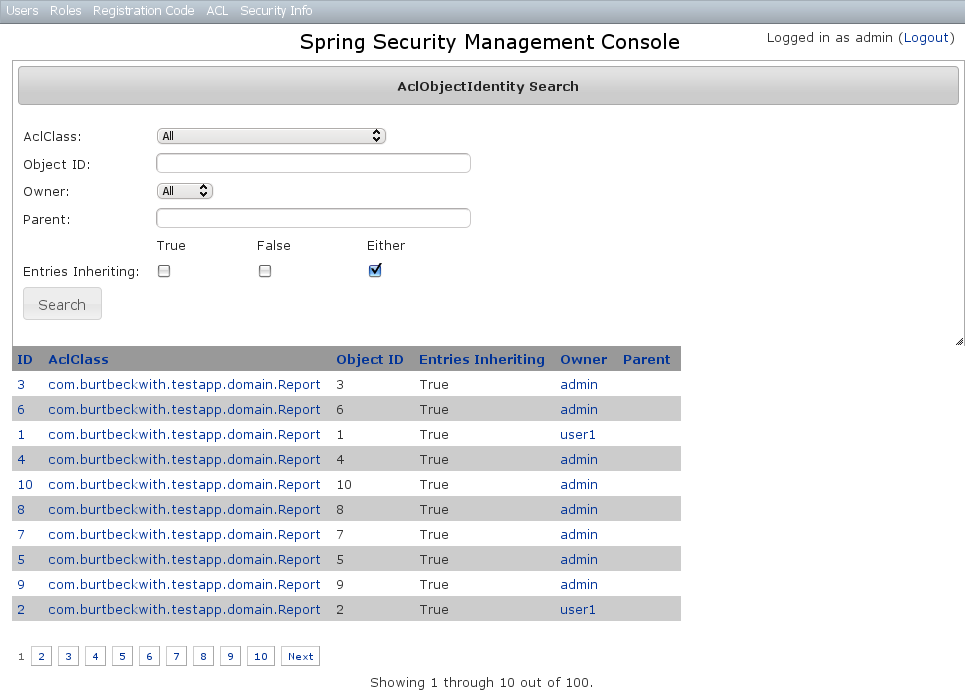
AclObjectIdentity Edit
After clicking through to an AclObjectIdentity you get to the edit page (there are no view pages):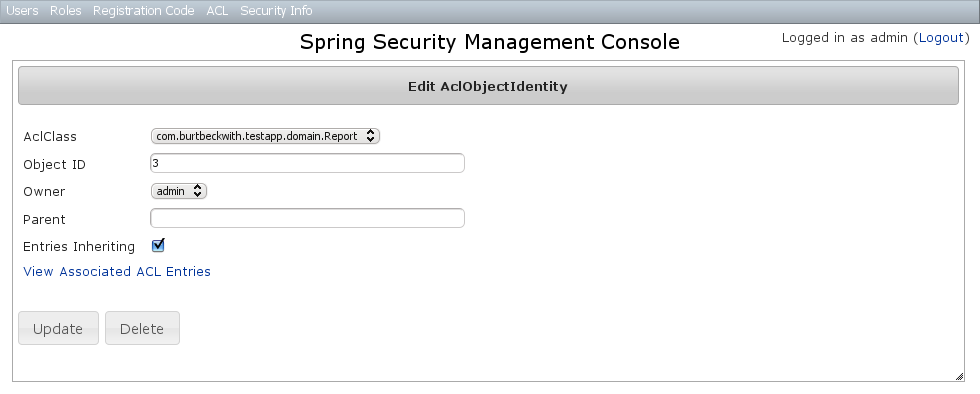 You can update any of the attributes, and can delete the instance if there aren't any associated
 AclEntry instances - by default there is no support for cascading.You can also see the associated AclEntry instances.AclObjectIdentity Create
You can create new instances by going to/aclObjectIdentity/create or by clicking the Create action in the OID menu under ACL.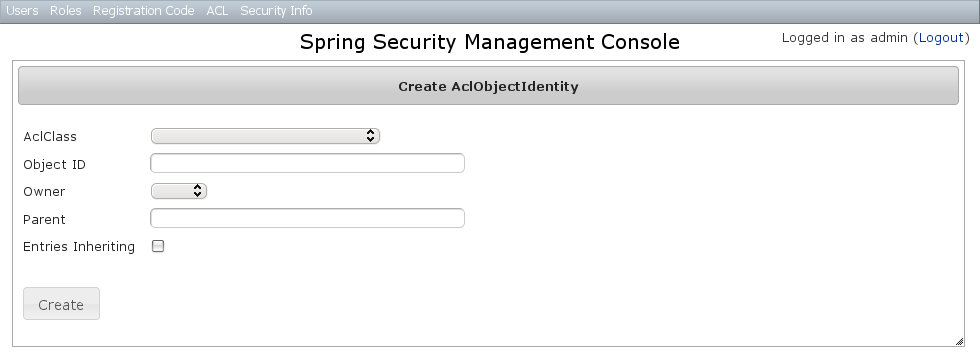
7.4 AclEntry Management
The default action for the AclEntry controller is search. By default only the standard fields are available but this is customizable with the Scripts script - see the section on configuration for details.Leave all fields at their default values to return all instances.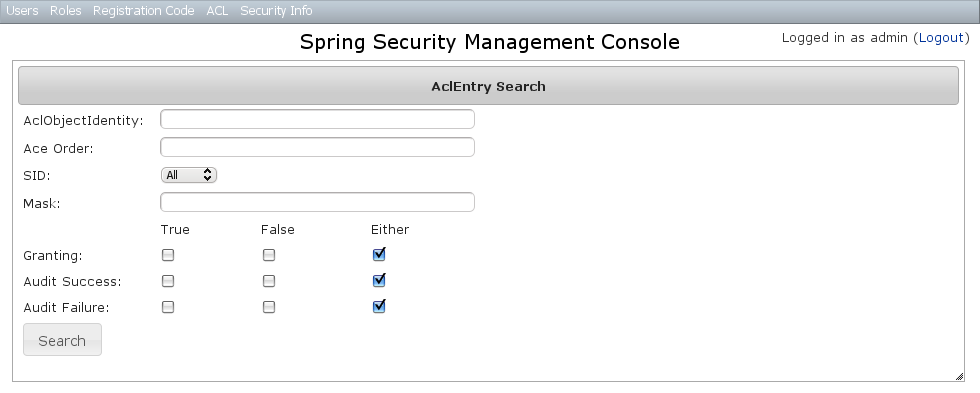 Results are shown paginated in groups of 10 and you can click on any header to sort by that field:
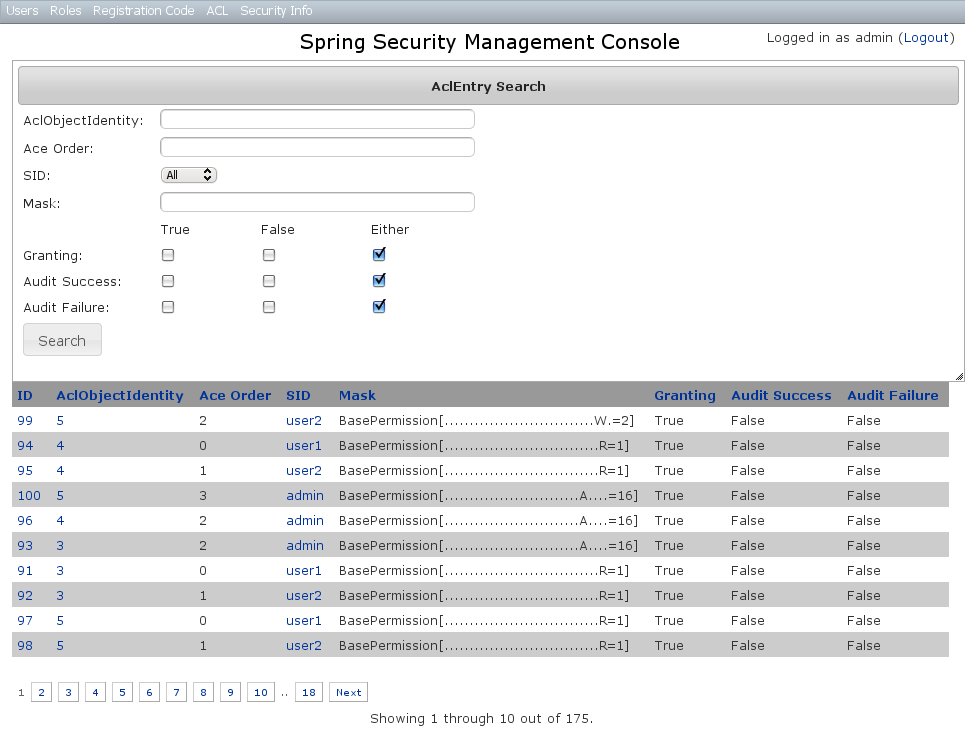
AclEntry Edit
After clicking through to an AclEntry you get to the edit page (there are no view pages):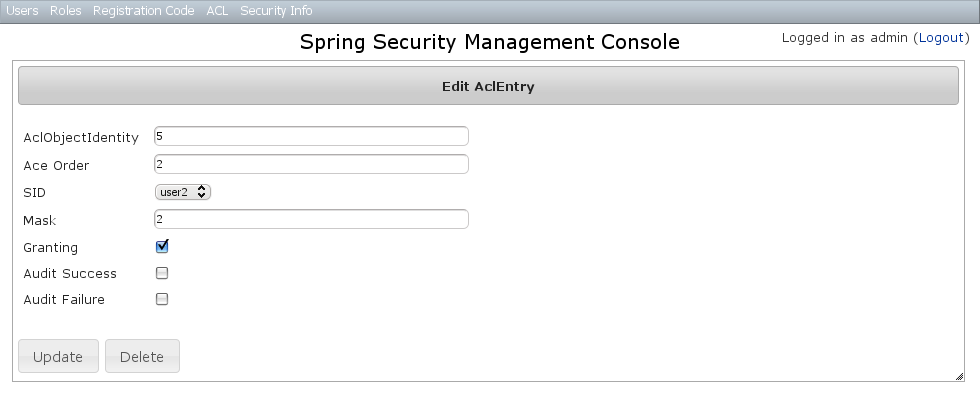 You can update any of the attributes or delete the AclEntry.
AclEntry Create
You can create new instances by going to/aclEntry/create or by clicking the Create action in the Entry menu under ACL.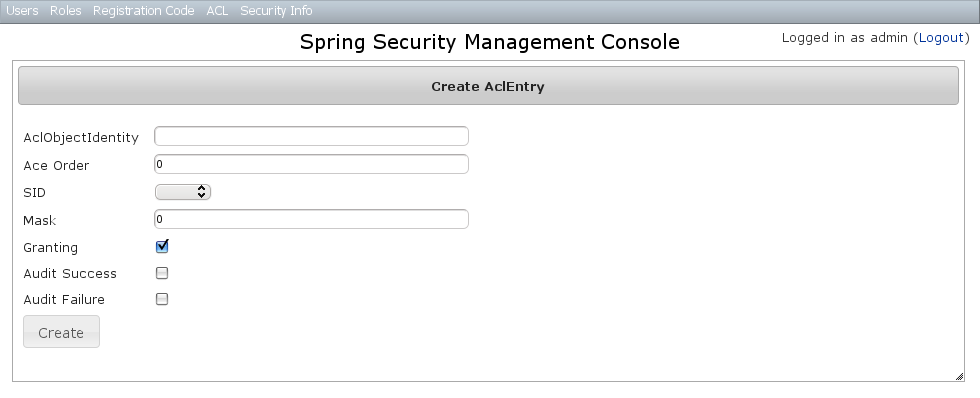
8 Persistent Cookie Management
Persistent cookies aren't enabled by default - you must enable them by running thes2-create-persistent-token script. See the Spring Security Core plugin documentation for details about this feature.The Persistent Logins menu is only shown if this feature is enabled.Persistent logins search
The default action for the PersistentLogin controller is search. By default only the standard fields (username, token, and series) are available but this is customizable with the Scripts script - see the section on configuration for details.You can search by any combination of fields, and all fields have an Ajax autocomplete to assist in finding instances. Leave all fields empty to return all instances.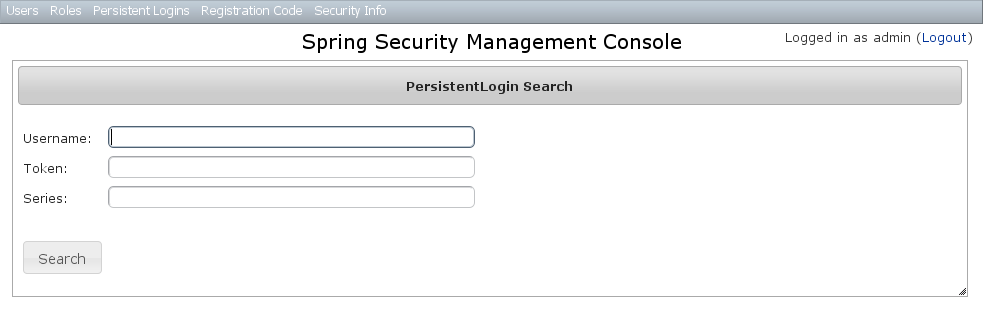 Searching is case-insensitive and the search string can appear anywhere in the field. Results are shown paginated in groups of 10 and you can click on any header to sort by that field:
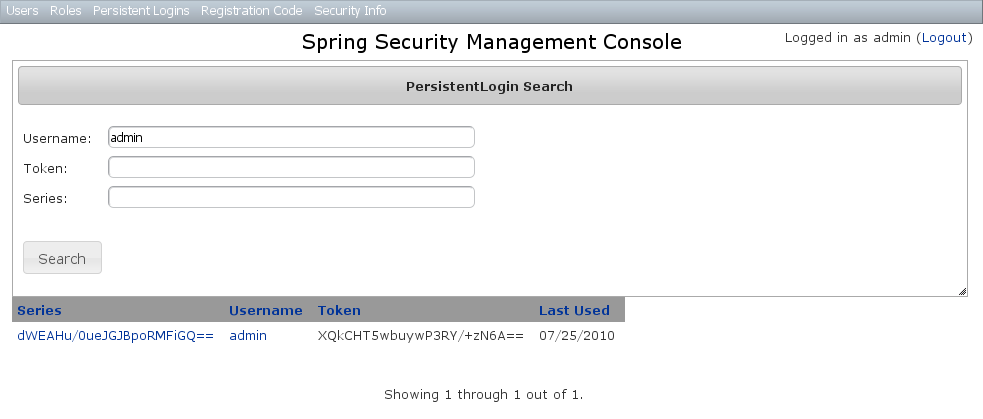
Persistent logins edit
After clicking through to an instance you get to the edit page (there are no view pages):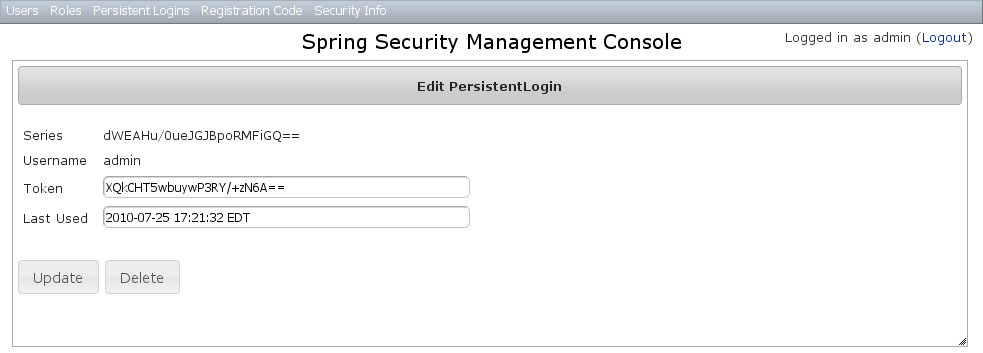 You can update the
 token or lastUsed attribute or delete the instance.Persistent logins creation
Since instances are created during authentication by the spring-security-core plugin, there is no functionality in this plugin to create new instances.9 Security Configuration UI
The Security Info menu has links for several pages that contain read-only views of much of the Spring Security configuration: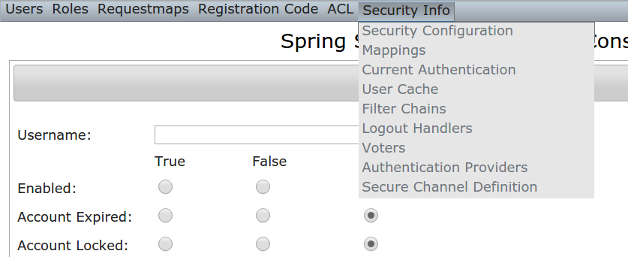
Security Configuration
The Security Configuration menu item displays all security-related attributes inConfig.groovy. The names omit the grails.plugin.springsecurity prefix: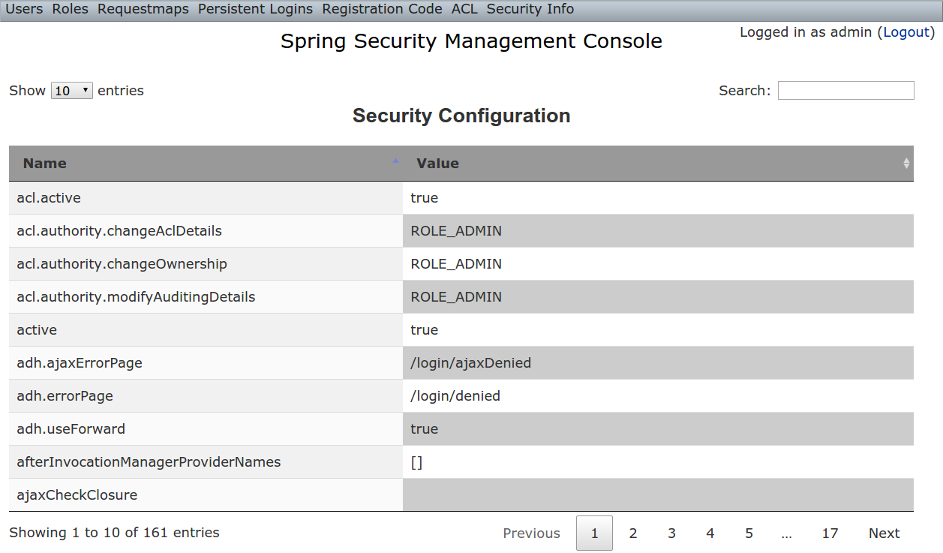
Mappings
The Mappings menu item displays the current request mapping mode (Annotation, Requestmap, or Static) and all current mappings:
Current Authentication
The Current Authentication menu item displays yourAuthentication information, mostly for reference to see what a typical one contains: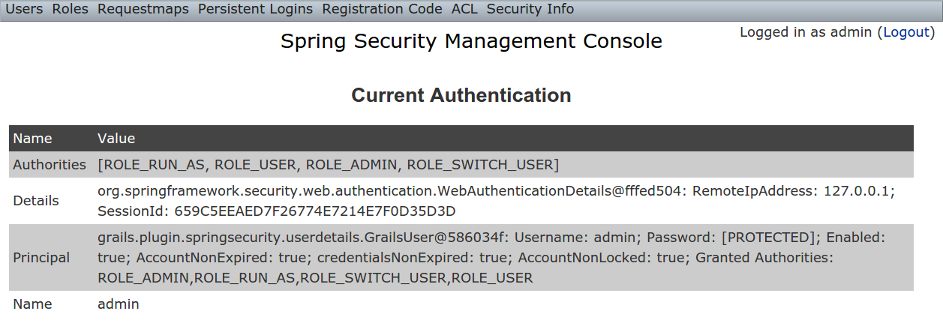
User Cache
The User Cache menu item displays information about cached users if the feature is enabled (it is disabled by default).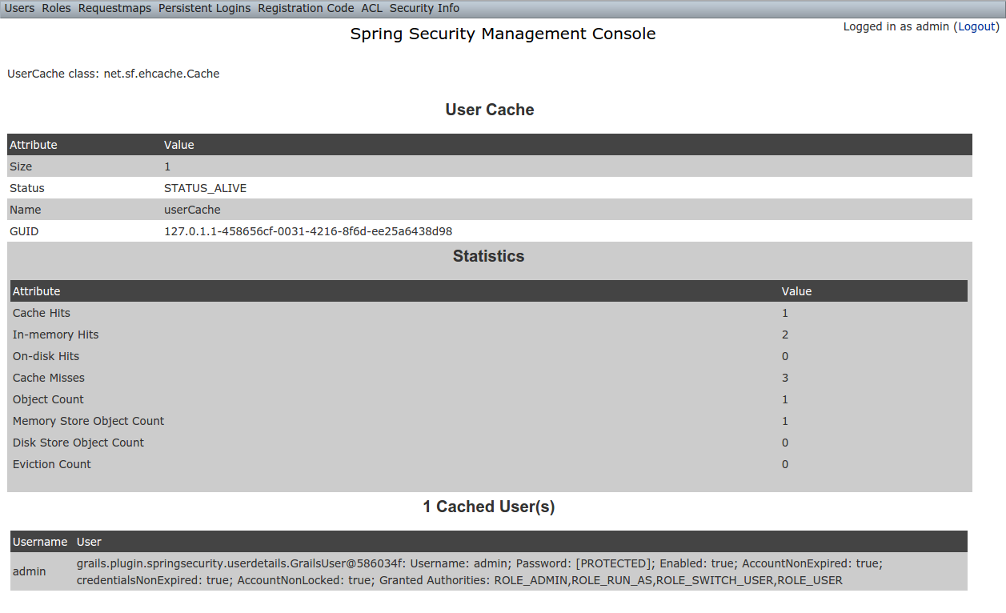
Filter Chains
The Filter Chains menu item displays your configured Filter chains. It is possible to have multiple URL patterns each with its own filter chain, for example when using HTTP Basic Auth for a web service. By default since the 2.0.0 release the spring-security-cores2-quickstart script configures empty filter chains for static assets to avoid unnecessary security checks (although of course if you need to secure some or all of your static assets you should reconfigure these).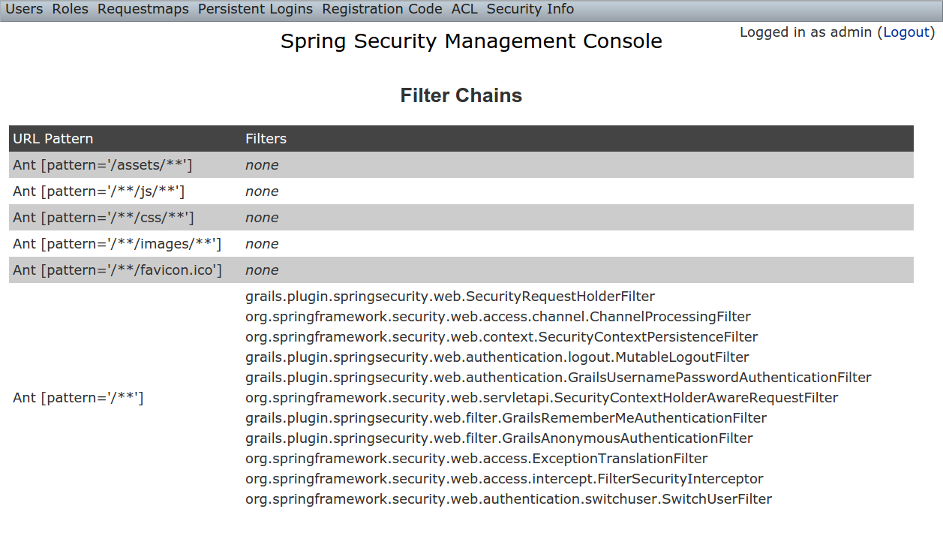
Logout Handlers
The Logout Handlers menu item displays your registeredLogoutHandlers. Typically there will be just the ones shown here, but you can register your own custom implementations, or a plugin might contribute more: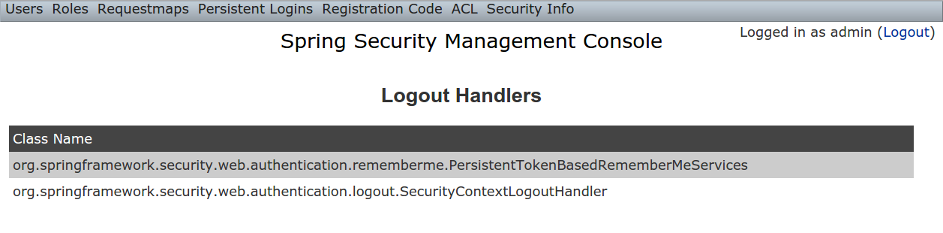
Voters
The Voters menu item displays your registeredAccessDecisionVoters. Typically there will be just the ones shown here, but you can register your own custom implementations, or a plugin might contribute more: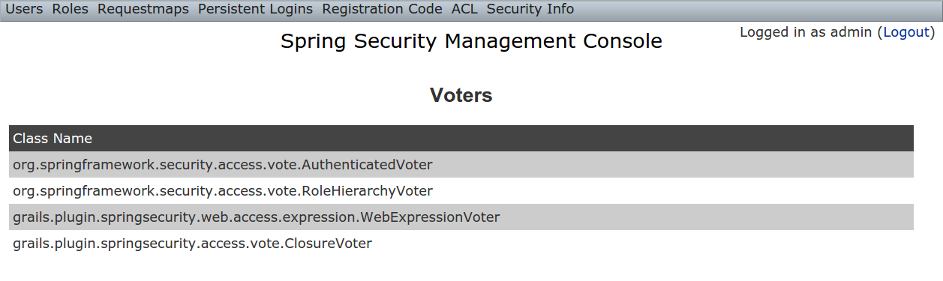
Authentication Providers
The Authentication Providers menu item displays your registeredAuthenticationProviders. Typically there will be just the ones shown here, but you can register your own custom implementations, or a plugin (e.g. LDAP) might contribute more: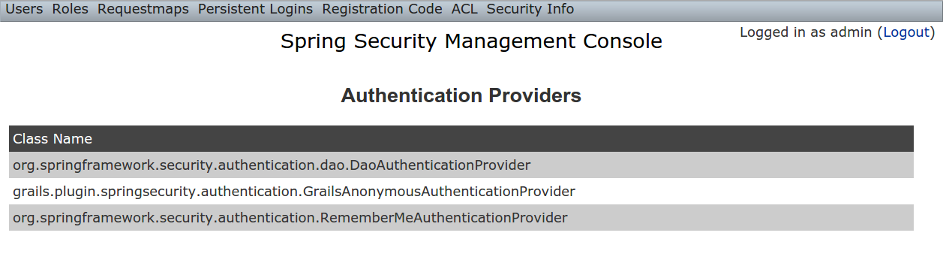
Secure Channel Definition
The Secure Channel Definition menu item displays your registered channel security mappings.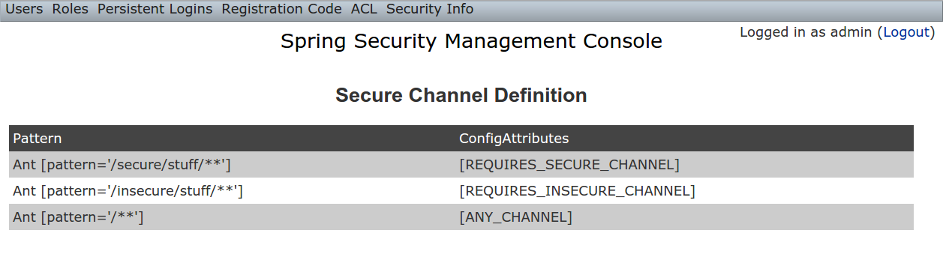
10 Customization
Most aspects of the plugin are configurable.s2ui-override script
The plugin's controllers and GSPs are easily overridden using the s2ui-override script. The general syntax for running the script is
grails s2ui-override <type> <controller-package>- aclclass
controller/AclClassController.groovyviews/aclClass/create.gspviews/aclClass/edit.gspviews/aclClass/search.gsp- aclentry
controller/AclEntryController.groovyviews/aclEntry/create.gspviews/aclEntry/edit.gspviews/aclEntry/search.gsp- aclobjectidentity
controller/AclObjectIdentityController.groovyviews/aclObjectIdentity/create.gspviews/aclObjectIdentity/edit.gspviews/aclObjectIdentity/search.gsp- aclsid
controller/AclSidController.groovyviews/aclSid/create.gspviews/aclSid/edit.gspviews/aclSid/search.gsp- auth
views/login/auth.gsp- layout
views/layouts/springSecurityUI.gspviews/includes/_ajaxLogin.gsp- persistentlogin
controller/PersistentLoginController.groovyviews/persistentLogin/edit.gspviews/persistentLogin/search.gsp- register
controller/RegisterController.groovyviews/register/forgotPassword.gspviews/register/register.gspviews/register/resetPassword.gsp- registrationcode
controller/RegistrationCodeController.groovyviews/registrationCode/edit.gspviews/registrationCode/search.gsp- requestmap
controller/RequestmapController.groovyviews/requestmap/create.gspviews/requestmap/edit.gspviews/requestmap/search.gsp- role
controller/RoleController.groovyviews/role/create.gspviews/role/edit.gspviews/role/search.gsp- securityinfo
controller/SecurityInfoController.groovyviews/securityInfo/config.gspviews/securityInfo/currentAuth.gspviews/securityInfo/filterChains.gspviews/securityInfo/logoutHandlers.gspviews/securityInfo/mappings.gspviews/securityInfo/providers.gspviews/securityInfo/secureChannel.gspviews/securityInfo/usercache.gspviews/securityInfo/voters.gsp- user
controller/UserController.groovyviews/user/create.gspviews/user/edit.gspviews/user/search.gsp
I18N
All of the plugin's displayed strings are localized and stored in the plugin'sgrails-app/i18n/messages.spring-security-ui.properties file. You can override any of these values by putting an override in your application's grails-app/i18n/messages.properties file.Config.groovy attributes
There are a few configuration options specified in DefaultUiSecurityConfig.groovy that can be overridden in your application's grails-app/conf/Config.groovyRegistration attributes
These settings are used in the registration workflow; see the User Registration section for more details:- grails.plugin.springsecurity.ui.register.defaultRoleNames
- grails.plugin.springsecurity.ui.register.emailBody
- grails.plugin.springsecurity.ui.register.emailFrom
- grails.plugin.springsecurity.ui.register.emailSubject
- grails.plugin.springsecurity.ui.register.postRegisterUrl
Forgot Password attributes
These settings are used in the forgot-password workflow; see the Forgot Password section for more details:- grails.plugin.springsecurity.ui.forgotPassword.emailBody
- grails.plugin.springsecurity.ui.forgotPassword.emailFrom
- grails.plugin.springsecurity.ui.forgotPassword.emailSubject
- grails.plugin.springsecurity.ui.forgotPassword.postResetUrl
GSP layout attributes
Thelayout attribute in the GSPs is configurable. If this is the only change you want to make in some or all of the GSPs then you can avoid copying the GSPs into your application just to make this change.The default value for the registration workflow GSPs (forgotPassword.gsp, register.gsp, and resetPassword.gsp) is "register" and the default for the rest is "springSecurityUI". These values can be overridden with the grails.plugin.springsecurity.ui.gsp.layoutRegister and grails.plugin.springsecurity.ui.gsp.layoutUi settings.Miscellaneous attributes
The role name required to be able to run as another user defaults toROLE_SWITCH_USER but you can override this name with the grails.plugin.springsecurity.ui.switchUserRoleName setting.CSS and JavaScript
The plugin uses the Asset Pipeline plugin to manage its resources. This makes it very easy to provide your own version of some or all of the static resources since asset-pipeline will always use a file in the application'sassets directory instead of a plugin's if it exists.Instead of depending on either the jQuery or jQuery UI plugins, this plugin includes its own copy of jquery.js, jquery-ui.js, and jquery-ui.css. Note that the versions are not hard-coded, but instead they take advantage of the feature in asset-pipeline where you can embed Groovy code in a file to specify the name and path.The layouts use grails-app/assets/javascripts/jquery.js, which contains this://=require jquery/jquery-${grails.plugin.springsecurity.ui.Constants.JQUERY_VERSION}.jsgrails-app/assets/javascripts/jquery/jquery-2.1.4.js, and to use your own version, either use the same approach in a file called jquery.js or rename your file to jquery.js.Likewise for jQuery UI, the JavaScript file is grails-app/assets/javascripts/jquery-ui.js, which contains this//=require jquery-ui/jquery-ui-${grails.plugin.springsecurity.ui.Constants.JQUERY_UI_VERSION}.jsgrails-app/assets/stylesheets/jquery-ui.css, which contains/*
*= require smoothness/jquery-ui-${grails.plugin.springsecurity.ui.Constants.JQUERY_UI_VERSION}.css
*/grails-app/assets/javascripts/jquery-ui/jquery-ui-1.10.3.custom.js, and to use your own version, either use the same approach in a file called jquery-ui.js or rename your file to jquery-ui.js.The CSS file resolves to grails-app/assets/stylesheets/smoothness/jquery-ui-1.10.3.custom.css, and to use your own version, either use the same approach in a file called jquery-ui.js or rename your file to jquery-ui.js.Use your own jquery-ui.js and/or jquery-ui.css to override the plugin's.The springSecurityUI.gsp layout includes grails-app/assets/stylesheets/spring-security-ui.css, which has no style declarations and only includes other CSS files:/* *= require reset.css *= require jquery-ui.css *= require jquery.jdMenu.css *= require jquery.jdMenu.slate.css *= require jquery.jgrowl.css *= require spring-security-ui-common.css */
grails-app/assets/javascripts/spring-security-ui.js which has no JavaScript code and only includes other JavaScript files://= require jquery.js //= require jquery-ui.js //= require jquery/jquery.jgrowl.js //= require jquery/jquery.positionBy.js //= require jquery/jquery.bgiframe.js //= require jquery/jquery.jdMenu.js //= require jquery/jquery.form.js //= require spring-security-ui-ajaxLogin.js
register.gsp layout layout includes grails-app/assets/stylesheets/spring-security-ui-register.css, which has no style declarations and only includes other CSS files:/* *= require reset.css *= require jquery-ui.css *= require jquery.jgrowl.css *= require spring-security-ui-common.css */
grails-app/assets/javascripts/spring-security-ui-register.js which has no JavaScript code and only includes other JavaScript files://= require jquery.js //= require jquery-ui.js //= require jquery/jquery.jgrowl.js
- grails-app/assets/javascripts/spring-security-ui-ajaxLogin.js
- grails-app/assets/javascripts/jquery/jquery.bgiframe.js
- grails-app/assets/javascripts/jquery/jquery.dataTables.js
- grails-app/assets/javascripts/jquery/jquery.form.js
- grails-app/assets/javascripts/jquery/jquery.jdMenu.js
- grails-app/assets/javascripts/jquery/jquery.jgrowl.js
- grails-app/assets/javascripts/jquery/jquery.positionBy.js
- grails-app/assets/stylesheets/jquery.dataTables.css
- grails-app/assets/stylesheets/jquery.jdMenu.css
- grails-app/assets/stylesheets/jquery.jdMenu.slate.css
- grails-app/assets/stylesheets/jquery.jgrowl.css
- grails-app/assets/stylesheets/reset.css
- grails-app/assets/stylesheets/spring-security-ui-auth.css
- grails-app/assets/stylesheets/spring-security-ui-common.css
Password Hashing
In recent versions of the Spring Security Core plugin, the "User" domain class is generated by thes2-quickstart script with code to automatically hash the password. This makes the code simpler (for example in controllers where you create users or update user passwords) but older generated classes don't have this generated code. This presents a problem for plugins like this one since it's not possible to reliably determine if the domain class hashes the password or if you use the older approach of explicitly calling springSecurityService.encodePassword().The unfortunate consequence of mixing a newer domain class that does password hashing with controllers that call springSecurityService.encodePassword() is the the passwords get double-hashed, and users aren't able to login. So to get around this there's a configuration option you can set to tell this plugin's controllers whether to hash or not: grails.plugin.springsecurity.ui.encodePassword.This option defaults to false, so if you have an older domain class that doesn't handle hashing just enable this plugin's hashing:grails.plugin.springsecurity.ui.encodePassword = trueStrategy classes
The plugin'sSpringSecurityUiService implements several "strategy" interfaces to make it possible to override its functionality in a more fine-grained way.These are defined by interfaces in the grails.plugin.springsecurity.ui.strategy package:
AclStrategyErrorsStrategyMailStrategyPersistentLoginStrategyPropertiesStrategyQueryStrategyRegistrationCodeStrategyRequestmapStrategyRoleStrategyUserStrategy
DefaultAclStrategy, DefaultErrorsStrategy, etc., and these simply delegate to SpringSecurityUiService (except for MailStrategy, which has MailPluginMailStrategy as its default implementation which uses the Mail plugin to send emails). Each of the default implementations is registered as a Spring bean:
uiAclStrategyuiErrorsStrategyuiMailStrategyuiPersistentLoginStrategyuiPropertiesStrategyuiQueryStrategyuiRegistrationCodeStrategyuiRequestmapStrategyuiRoleStrategyuiUserStrategy
grails-app/conf/spring/resources.groovy, e.g.import com.myapp.MyRequestmapStrategybeans = {
uiRequestmapStrategy(MyRequestmapStrategy)
}Password Verification
By default the registration controller has rather strict requirements for valid passwords; they must be between 8 and 64 characters and must include at least one uppercase letter, at least one number, and at least one symbol from "!@#$%^&". You can customize these rules with these Config.groovy attributes:| Property | Default Value |
|---|---|
| grails.plugin.springsecurity. ui.password.minLength | 8 |
| grails.plugin.springsecurity. ui.password.maxLength | 64 |
| grails.plugin.springsecurity. ui.password.validationRegex | "^.*(?=.*\\d)(?=.*[a-zA-Z])(?=.*[!@#$%^&]).*$" |