
2 Getting Started - Reference Documentation
Authors: Graeme Rocher, Peter Ledbrook, Marc Palmer, Jeff Brown, Luke Daley, Burt Beckwith
Version: 1.3.9
Table of Contents
2 Getting Started
2.1 Downloading and Installing
The first step to getting up and running with Grails is to install the distribution. To do so follow these steps:- Download a binary distribution of Grails and extract the resulting zip file to a location of your choice
- Set the GRAILS_HOME environment variable to the location where you extracted the zip
- On Unix/Linux based systems this is typically a matter of adding something like the following
export GRAILS_HOME=/path/to/grailsto your profile - On Windows this is typically a matter of setting an environment variable under
My Computer/Advanced/Environment Variables - Now you need to add the
bindirectory to yourPATHvariable: - On Unix/Linux base system this can be done by doing a
export PATH="$PATH:$GRAILS_HOME/bin" - On windows this is done by modifying the
Pathenvironment variable underMy Computer/Advanced/Environment Variables
grails in the terminal window and see output similar to the below:
Welcome to Grails 1.0 - http://grails.org/
Licensed under Apache Standard License 2.0
Grails home is set to: /Developer/grails-1.0
No script name specified. Use 'grails help' for more info
2.2 Upgrading from previous versions of Grails
Although the Grails development team have tried to keep breakages to a minimum there are a number of items to consider when upgrading a Grails 1.0.x, 1.1.x, or 1.2.x applications to Grails 1.3. The major changes are described in detail below.Upgrading from Grails 1.2.x
Plugin Repositories
As of Grails 1.3, Grails no longer natively supports resolving plugins against secured SVN repositories. Grails 1.2 and below's plugin resolution mechanism has been replaced by one built on Ivy the upside of which is that you can now resolve Grails plugins against Maven repositories as well as regular Grails repositories.Ivy supports a much richer setter of repository resolvers for resolving plugins with, including support for Webdav, HTTP, SSH and FTP. See the section on resolvers in the Ivy docs for all the available options and the section of plugin repositories in the user guide which explains how to configure additional resolvers.If you still need support for resolving plugins against secured SVN repositories then the IvySvn project provides a set of Ivy resolvers for resolving against SVN repositories.Upgrading from Grails 1.1.x
Plugin paths
In Grails 1.1.x typically apluginContextPath variable was used to establish paths to plugin resources. For example:<g:resource dir="${pluginContextPath}/images" file="foo.jpg" />
<g:resource dir="images" file="foo.jpg" />
<g:resource contextPath="" dir="images" file="foo.jpg" />
Tag and Body return values
Tags no longer returnjava.lang.String instances but instead return a StreamCharBuffer instance. The StreamCharBuffer class implements all the same methods as String, however code like this may break:def foo = body() if(foo instanceof String) { // do something }
java.lang.CharSequence interface, which both String and StreamCharBuffer implement:def foo = body() if(foo instanceof CharSequence) { // do something }
New JSONBuilder
There is a new version ofJSONBuilder which is semantically different to earlier versions of Grails. However, if your application depends on the older semantics you can still use the now deprecated implementation by settings the following property to true in Config.groovy:grails.json.legacy.builder=trueValidation on Flush
Grails now executes validation routines when the underlying Hibernate session is flushed to ensure that no invalid objects are persisted. If one of your constraints (such as a custom validator) is executing a query then this can cause an addition flush resulting in aStackOverflowError. Example:static constraints = { author validator: { a -> assert a != Book.findByTitle("My Book").author } }
StackOverflowError in Grails 1.2. The solution is to run the query in a new Hibernate session (which is recommended in general as doing Hibernate work during flushing can cause other issues):static constraints = { author validator: { a -> Book.withNewSession { assert a != Book.findByTitle("My Book").author } } }
Upgrading from Grails 1.0.x
Groovy 1.6
Grails 1.1 and above ship with Groovy 1.6 and no longer supports code compiled against Groovy 1.5. If you have a library that is written in Groovy 1.5 you will need to recompile it against Groovy 1.6 before using it with Grails 1.1.Java 5.0
Grails 1.1 now no longer supports JDK 1.4, if you wish to continue using Grails then it is recommended you stick to the Grails 1.0.x stream until you are able to upgrade your JDK.Configuration Changes
1) The settinggrails.testing.reports.destDir has been renamed to grails.project.test.reports.dir for consistency.2) The following settings have been moved from grails-app/conf/Config.groovy to grails-app/conf/BuildConfig.groovy:
grails.config.base.webXmlgrails.project.war.file(renamed fromgrails.war.destFile)grails.war.dependenciesgrails.war.copyToWebAppgrails.war.resources
grails.war.java5.dependencies option is no longer supported, since Java 5.0 is now the baseline (see above).4) The use of jsessionid (now considered harmful) is disabled by default. If your application requires jsessionid you can re-enable its usage by adding the following to grails-app/conf/Config.groovy:grails.views.enable.jsessionid=truePlugin Changes
Since 1.1, Grails no longer stores plugins inside yourPROJECT_HOME/plugins directory by default. This may result in compilation errors in your application unless you either re-install all your plugins or set the following property in grails-app/conf/BuildConfig.groovy:grails.project.plugins.dir="./plugins"Script Changes
1) If you were previously using Grails 1.0.3 or below the following syntax is no longer support for importing scripts from GRAILS_HOME:Ant.property(environment:"env") grailsHome = Ant.antProject.properties."env.GRAILS_HOME"includeTargets << new File ( "${grailsHome}/scripts/Bootstrap.groovy" )
grailsScript method to import a named script:includeTargets << grailsScript( "Bootstrap.groovy" )Ant should be changed to ant.3) The root directory of the project is no long on the classpath, the result is that loading a resource like this will no longer work:def stream = getClass().classLoader.getResourceAsStream(
"grails-app/conf/my-config.xml")basedir property:new File("${basedir}/grails-app/conf/my-config.xml").withInputStream { stream -> // read the file }
Command Line Changes
Therun-app-https and run-war-https commands no longer exist and have been replaced by an argument to run-app:grails run-app -https
Data Mapping Changes
1) Enum types are now mapped using their String value rather than the ordinal value. You can revert to the old behavior by changing your mapping as follows:static mapping = { someEnum enumType:"ordinal" }
REST Support
Incoming XML requests are now no longer automatically parsed. To enable parsing of REST requests you can do so using theparseRequest argument inside a URL mapping:"/book"(controller:"book",parseRequest:true)
resource argument, which enables parsing by default:"/book"(resource:"book")
2.3 Creating an Application
To create a Grails application you first need to familiarize yourself with the usage of thegrails command which is used in the following manner:grails [command name]
grails create-app helloworld
cd helloworld2.4 A Hello World Example
To implement the typical "hello world!" example run the create-controller command:
grails create-controller hello grails-app/controllers directory called helloworld/HelloController.groovy.If no package is specified with create-controller script, Grails automatically uses the application name as the package name.Controllers are capable of dealing with web requests and to fulfil the "hello world!" use case our implementation needs to look like the following:
package helloworld
class HelloController {
	def world = {
		render "Hello World!"
	}
}
grails run-apphttp://localhost:8080/helloworldThe result will look something like the following screenshot: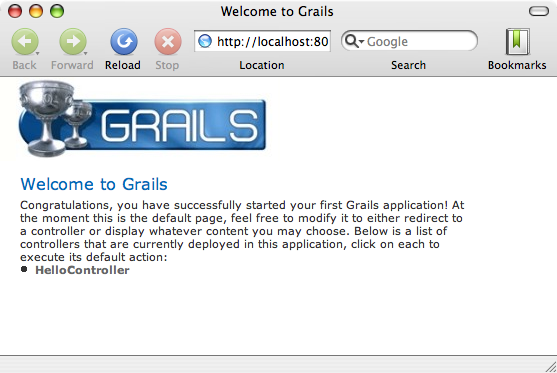 This is the Grails intro page which is rendered by the
 web-app/index.gsp file. You will note it has a detected the presence of your controller and clicking on the link to our controller we can see the text "Hello World!" printed to the browser window.
2.5 Getting Set-up in an IDE
IntelliJ IDEA
IntelliJ IDEA and the JetGroovy plug-in offer good support for Groovy & Grails developer. Refer to the section on Groovy and Grails support on the JetBrains website for a feature overview.To integrate Grails 1.2 to with IntelliJ run the following command to generate appropriate project files:grails integrate-with --intellij
NetBeans
A good Open Source alternative is Sun's NetBeans, which provides a Groovy/Grails plugin that automatically recognizes Grails projects and provides the ability to run Grails applications in the IDE, code completion and integration with Sun's Glassfish server. For an overview of features see the NetBeans Integration guide on the Grails website which was written by the NetBeans team.Eclipse
We recommend that users of Eclipse looking to develop Grails application take a look at SpringSource Tool Suite, which offers built in support for Grails including automatic classpath management, a GSP editor and quick access to Grails commands. See the STS Integration page for an overview.TextMate
Since Grails' focus is on simplicity it is often possible to utilize more simple editors and TextMate on the Mac has an excellent Groovy/Grails bundle available from the Texmate bundles SVN.To integrate Grails 1.2 to with TextMate run the following command to generate appropriate project files:grails integrate-with --textmate
mate .
2.6 Convention over Configuration
Grails uses "convention over configuration" to configure itself. This typically means that the name and location of files is used instead of explicit configuration, hence you need to familiarize yourself with the directory structure provided by Grails.Here is a breakdown and links to the relevant sections:grails-app- top level directory for Groovy sourcesconf- Configuration sources.controllers- Web controllers - The C in MVC.domain- The application domain.i18n- Support for internationalization (i18n).services- The service layer.taglib- Tag libraries.utils- Grails specific utilities.views- Groovy Server Pages - The V in MVC.scripts- Gant scripts.src- Supporting sourcesgroovy- Other Groovy sourcesjava- Other Java sourcestest- Unit and integration tests.
2.7 Running an Application
Grails applications can be run with the built in Tomcat server using the run-app command which will load a server on port 8080 by default:grails run-app
server.port argument:grails -Dserver.port=8090 run-app
2.8 Testing an Application
Thecreate-* commands in Grails automatically create integration tests for you within the test/integration directory. It is of course up to you to populate these tests with valid test logic, information on which can be found in the section on Testing. However, if you wish to execute tests you can run the test-app command as follows:grails test-app
build.xml which can also run the tests by delegating to Grails' test-app command:ant test
2.9 Deploying an Application
Grails applications are deployed as Web Application Archives (WAR files), and Grails includes the war command for performing this task:grails war
target directory which can then be deployed as per your container's instructions.NEVER deploy Grails using the run-app command as this command sets Grails up for auto-reloading at runtime which has a severe performance and scalability implicationWhen deploying Grails you should always run your containers JVM with the
-server option and with sufficient memory allocation. A good set of VM flags would be:-server -Xmx512M
2.10 Supported Java EE Containers
Grails runs on any Servlet 2.4 and above container and is known to work on the following specific container products:- Tomcat 5.5
- Tomcat 6.0
- SpringSource tc Server
- SpringSource dm Server 1.0
- GlassFish v1 (Sun AS 9.0)
- GlassFish v2 (Sun AS 9.1)
- GlassFish v3 Prelude
- Sun App Server 8.2
- Websphere 6.1
- Websphere 5.1
- Resin 3.2
- Oracle AS
- JBoss 4.2
- Jetty 6.1
- Jetty 5
- Weblogic 7/8/9/10
2.11 Generating an Application
To get started quickly with Grails it is often useful to use a feature called Scaffolding to generate the skeleton of an application. To do this use one of thegenerate-* commands such as generate-all, which will generate a controller and the relevant views:grails generate-all Book
2.12 Creating Artefacts
Grails ships with a few convenience targets such as create-controller, create-domain-class and so on that will create Controllers and different artefact types for you.These are merely for your convenience and you can just as easily use an IDE or your favourite text editor.For example to create the basis of an application you typically need a domain model:
grails create-domain-class book
grails-app/domain/Book.groovy such as:class Book {
}create-* commands that can be explored in the command line reference guide.To decrease the amount of time it takes to run Grails scripts, use the interactive mode.